Wedding Design//

I hope everyone is enjoying their memorial day weekend! I spent my afternoon boating with the parents and trying to soak in as much rays as possible. Our family lives for summer sunshine and long days on the water!

This week has been an absolute blast as we re-live our wedding through all our pictures. Our very talented photographer, Arielle Peters, also happens to be my very sweet cousin-in-law and we were incredibly blessed to have such talent for our special day! Seriously, if you want her info let me know, she’s the best, in my very biased opinion!

One thing I’ve been wanting to do since the planning of our wedding is see how all my decor ideas and visions finally came together for the big day, and honestly it was EXACTLY how I saw it in my head! It’s always great when that happens isn’t it? Today I wanted to show off the elements I used!

Side Note: If anyone is interested in hiring me to help with a wedding coming up- Contact me! I would love to build my portfolio and help anyone that finds designing the challenging part. 

So here’s the 411 on all the wedding decor:

Colors: Shades of mint, gold, white, purple, hot pink

Theme: Bohemian, eclectic glam

Flowers: White Ranaculas, hot pink carnations, purple misty, babys breath, potted succulents, and fresh lilac

When I first started planning out our wedding decor I knew I wanted gold and bright colors. It was going to be spring so I knew I wanted to nice soft spring color for the girls dresses, and aqua/mint just happens to be my favorite color, so that was an easy pick! Then I simply picked complementary colors to match those two.

One of my suggestions would be not to solidify your complementary colors until you go look at flowers. I wasn’t planning on having any purple flowers in our wedding and then fell in love with these beautiful wildflowers that were all purple, so that got added! And by the way it adds to the bouquets and table arrangements I say it was the best decision I made for the decor. So don’t get hung up on the dreams in your head, because something better could come along!

Alright now the details…

  1. The Guest Tables

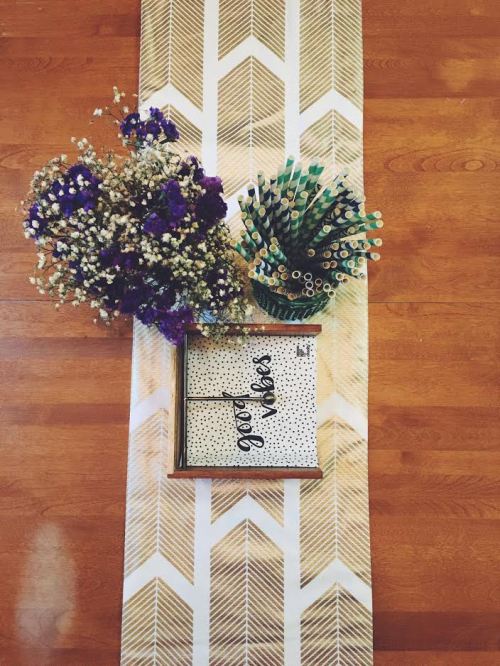
I knew I wanted a long farmhouse table look, with the vases scattered through out the middle lining the entire length. Once I picked white tablecloths, using the gold accent of a table runner was a no brainer to add color, but not too much. It was the perfect subtle accent.

Most of the vases I used were bought at Hobby Lobby on half off weeks, or dollar tree and spray painted. The pots for the tiny succulents were a Hobby Lobby purchase and we simply painted them gold with brushes. Spray paint was bought in bulk for these projects, but it was worth it! Lastly, the dinos! My favorite part and all because of my cute, nerdy husbands love for them. I found bags of 250 dino’s through a teacher magazine of my moms, we ordered two bags and simply spray painted them gold!

For the place settings, I was able to borrow china from a family friend’s past wedding. They had all different versions of white plain dishes and silverware so each person had a different style, but I was still able to keep the simplicity of the white. Their name tag and wedding favor dinosaur sat on top as they arrived to their seat.


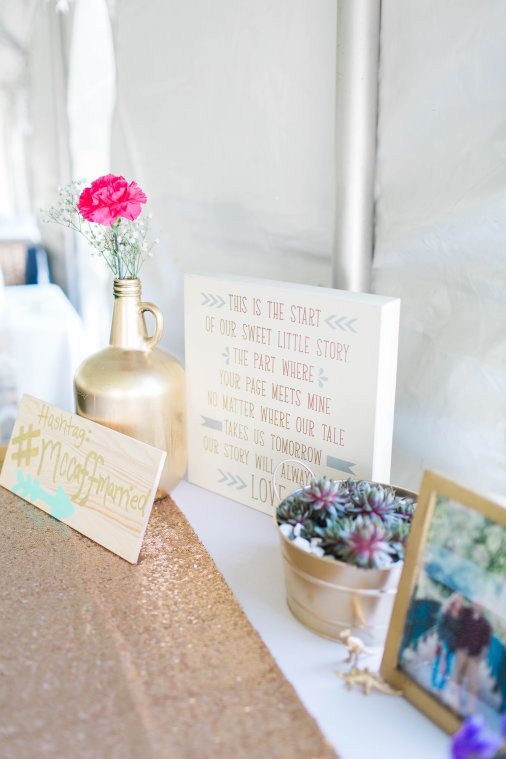
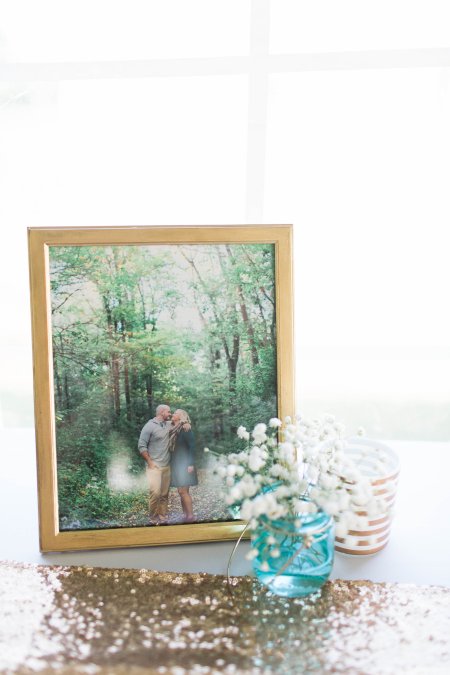
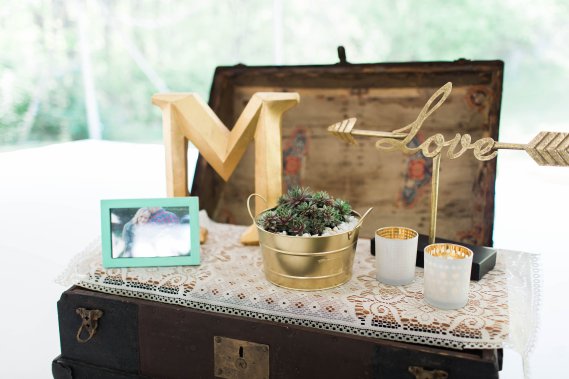
2. The Guestbook and Gifts Table

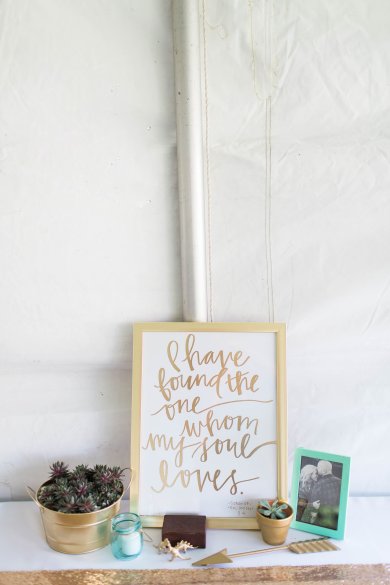
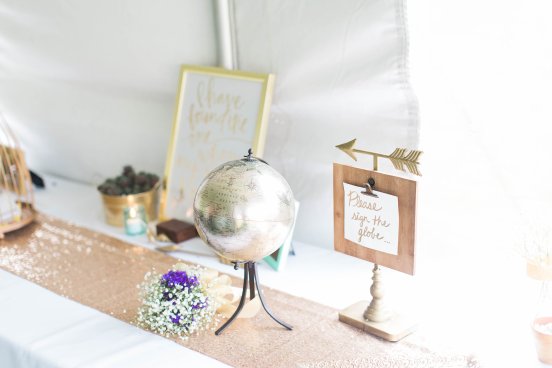
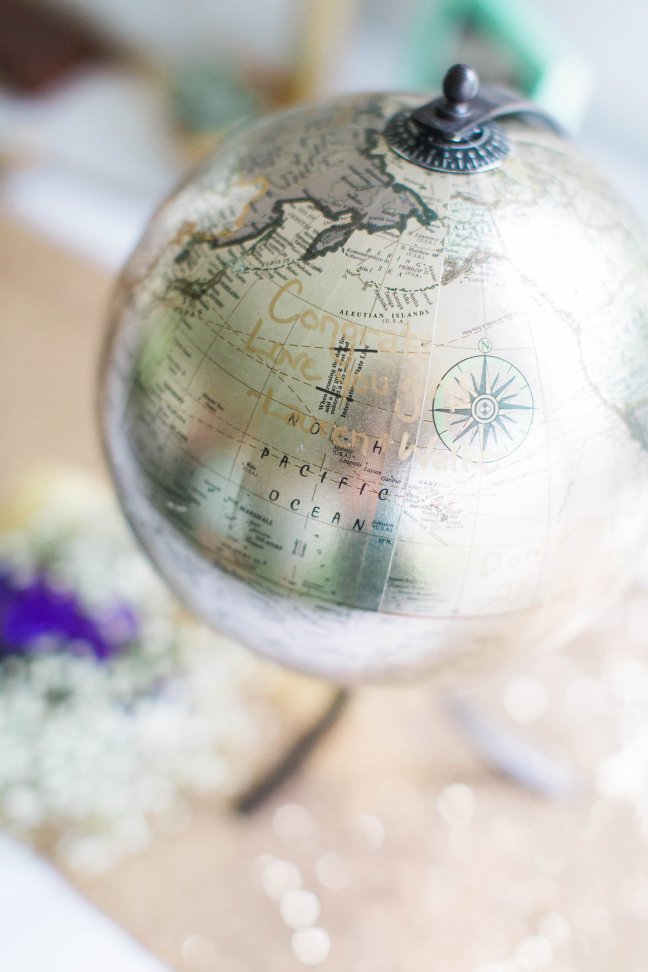
This table was really fun, because I had over time collected different wall art about starting our story together to add with our engagement pictures. I used vases that were also used on the guest tables, and also added some unique elements. Our guest book was a globe I found at Hobby Lobby. Chris and I love to travel, and we though it was the perfect piece we could use in our homes for, forever. Our cards were placed in between the spokes of a gold birdcage I also found at Hobby Lobby. My favorite part was the sparkling sequin table runner that added so much glam and color to the white linens.
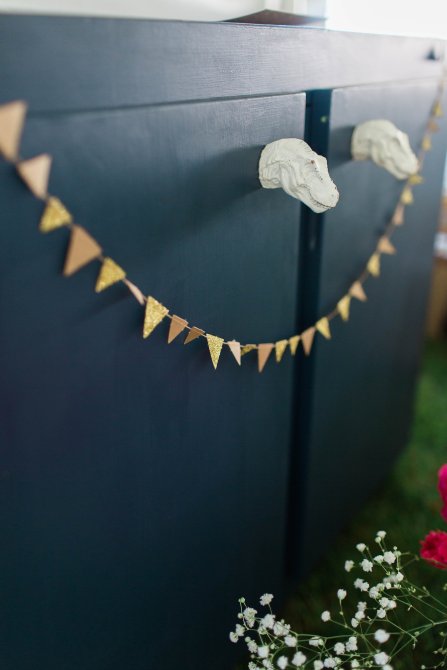
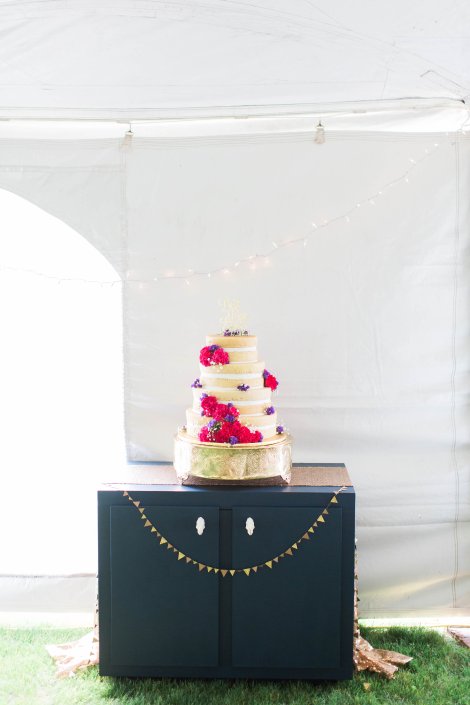
 

Details-32Details-37Details-35


Details-90Details-92


3. The Cake Table

The cake table is near and dear to my heart. I found the cabinet at a little shop in Broad Ripple, Indianapolis with one of my bridesmaids. It was already painted mint, and heavy as sin, and I LOVED it! As planning went on, I knew we’d use it in our home and the mint didn’t match so I decided to bring in the navy since the guys would be wearing navy to accent the girl’s mint dresses. Then I got creative and added T-Rex heads as the door knobs. I threw on another sparkly table runner, and a cute little sparkle banner and it was perfect for our delicious naked cake!

Details-40Details-78


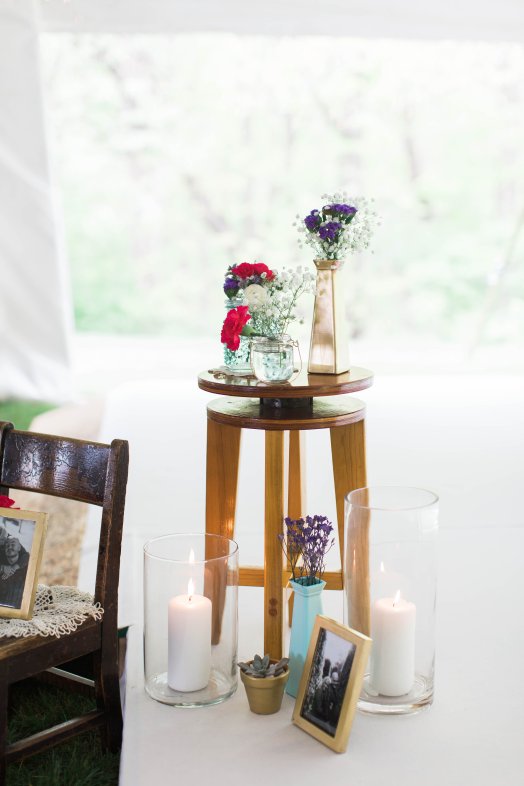
4. The Ceremony Stage

At this point on Saturday afternoon my brain was fried from putting everything together. My girls helped me a lot when putting the stage together for the ceremony the next day. The special part of it is, a lot of it was family heirlooms. The chest, the little chair, and stool were all passed down on one side of my family. We added some sweet little doily’s and more of the glam gold and flowers and it was the PERFECT mix of what I was going for.

Details-23Details-24Ceremony-19


I hope you enjoyed relishing in the beauty that is a wedding. If I could just decorate weddings and homes all the time I think I’d be in heaven!

Anyone who would like help decorating their wedding, find my contact information on the contact page! I’d love to work with you!

XOXO

My Bright & Shiny Kitchen//

Hey Guys! I’m back! Seriously, from this point on I’ll be making an effort to blog regularly and I’m so excited about it!

Since I got married and our loved one’s were so generous I am finally able to complete different rooms in the house, and I thought I’d start with our kitchen/dining area.

*Please note, I cannot control wall colors, cabinets, or carpeting! We live in an apartment*

Color Scheme:

  • Mint, Coral, Navy and Gold

My Favorite Pieces:

  • Open Shelving Unit
  • Mint Kitchen Aid Mixer
  • Mismatched colored chairs
  • Window Succulents

Let me introduce you to my kitchen/dining area…

Processed with VSCO with f2 preset


  1. The Table

Processed with VSCO with f2 preset

The Details:

  • Gold arrow table runner adds texture and bright color against the wood
  • A dried bouquet from our wedding adds a pop of another bold color with the purple
  • Those straws are adding fun flair for guests and us!
  • I LOVE my mismatched chairs- they’re rough and scratched up and just perfect!


2. Open Shelving Unit

Processed with VSCO with f2 preset


The Details: 

  • Gold spray painted shelving
  • Family China to add some history and blue along with our white plates
  • That mint colored mixer!!
  • The top shelf includes some old pyrex and recipe books from my sweet grandmother
  • I just LOVE open shelving! It adds so much to a room, but obviously keep it organized!


3. Everyday Station

Processed with VSCO with f2 preset

Processed with VSCO with f2 preset

The Details: 

  • Gold rimmed chalkboard(from our wedding) helps us keep organized
  • I love the little touch of a bar cart, and it helps us keep our life together


4. Decor, Decor

Processed with VSCO with f2 preset

Processed with VSCO with f2 preset

Processed with VSCO with f2 preset

The Details:

  • Extra Shelving, gold painted mugs
  • Coral curtains
  • SUCCULENTS- I love them live plants and I still haven’t killed them!


Hope you’ve enjoyed my kitchen/dining area, I’ve loved how it’s come together!

Xoxo

Shelf Styling//

It’s been TOO LONG since I blogged! I sincerely had no time amongst the moving and starting a new job, but BONUS, now I have my own designs to show you as well!

Since I’m still piecing rooms together I don’t want to do a full room yet, so I’ve decided to do my favorite, for the most part, finished pieces among our apartment for now.

Today: How to style a shelving unit

Processed with VSCOcam with f2 preset


Here are a few tips and tricks I try to stick to:

  1. Stay Simple

As you can see, I’m not overwhelming my shelves. I use enough pieces to consider it useful, but not enough that it seems like I didn’t have anywhere else to put things. Over clutter is the death of a good shelving unit. 

2. Use Different Shapes and Levels

Visually, if everything is the same level, or same shape, it’d be a rather boring unit. Notice the way I’ve set things up. I have books and records on multiple shelves, but I’ve placed them horizontally, vertically, in the middle of the shelf, or to the side. I’ve also added different items to accentuate height or fill a tiny open space from vases, to candles, to the picture frame.

Processed with VSCOcam with f2 preset

     3. Personalize it

I love fresh flowers so I’ve added that in two different places. We also recieved this sweet engraved box from our photographer with our engagement pictures, I love that our initials are on it, and it sits perfectly on that shelf. I also LOVE candles. Ask my fiance, or really anyone that knows me, I don’t have a room without a candle.

Find the things you love and fill your home with it! Don’t be afraid to step outside the lines a little either. Our living room is very eclectic with boho accents and gallery walls. This industrial shelf ties it all together!


To all those in Indiana, stay warm and safe tonight!

Xoxo

The Perfect Bar Cart//

I feel like there’s nothing more classy than a well styled bar cart. Bar carts are coming back in high demand in the interior world right now, so there’s never a better time to experiment!

The great thing is, they’re so EASY to DIY. Even if you don’t drink you can still style a bangin’ bar cart to add some class and style. If you’re looking for a statement piece for your room re-do then this is perfect for you! 

First, I wanted to list out the top bar carts to buy- some can transform as a DIY and some are already bar cart made and ready to style:

  1. Ikea Utility Cart, $29.99
  2. Target, Metal and Wood Bar Cart, $129.99
  3. Threshold Rattan Bar Cart, $129.99
  4. World Market, Utility/Wood Bar Cart, $169.99
  5. Ikea 3-Tier Cart, $24.99
  6. Ikea Laptop Table/Desk, $39.99

I wanted to give everyone different options of Inexpensive DIY carts, to fully ready- now let’s style them! 

  1. Make sure you have your cart fully stocked! 
  2. Find cute vases and or trinkets to style the cart
  3. Use your best glasses and mugs
  4. Style the tray tops to add more color and pop
  5. Find a great accent tray


Here are some examples of my favorite bar carts I’ve found. I’ll be going for a gold/white look once Chris and I are all moved into our new place. Personally, I’m DIY-ing this thing as we will be trying to fully finish an entire apartment and a styled bar cart is out of my price range. ENJOY!


Gold and White Styling


Accessories


Industrial/Rustic Styles


Ikea Hacks

ikea hackk


Don’t forget- it doesn’t have to be alcohol related. You can easily convert these into coffee bars, storage carts, diaper carts, or open shelving. The options are endless! 


XOXO


Dollar Vases and Glitter//

It’s been weeks of DIY for the wedding and I’ve been so thankful to the many people that have helped me get almost all my projects checked off the list!

Last night, Momma Smith and I worked on the few remaining vases and I decided to experiment a bit. I know, I know with wedding decor?! But these were dollar vases so if I messed up we weren’t out too much.

In earlier projects I’d carefully taped off vases along side my helpers and they did turn out great, but I wanted a different effect this time and  I think all the different looks will look great together!


Here are the essentials you’ll need for these vases:

  1. Clear vases from Dollar Tree (literally one dollar)
  2. Spray Adhesive
  3. Metallic Gold spray paint
  4. Extra fine gold glitter
  5. Latex gloves to protect your hands

Processed with VSCOcam with f2 preset

Now we did all spray painting in the house so the paint sets right with the cold- if you do this, try to tape up a box so you can set it inside to spray. We don’t need paint everywhere, right?! 

wedding projects

Gold Spray Paint

With the gold spray paint all we did was simply spray the bottom and let it die off as you neared the top of the vase. Spray it gradually and slowly so you don’t spray too much and it drips, and it also allows you to have that subtle end of the paint into the glass.

Spray Adhesive and Glitter

I did the same thing with the spray adhesive, just spray it gradually where on the vase you’d like the glitter to be, stagger the sprays so you have some different edging, and then sprinkle the glitter onto the adhesive, let dry.


Here are the final products: 

Processed with VSCOcam with f2 preset


Don’t they look great?! How awesome will a flickering candle look with the fade of the paint?

I’m so excited about how these turned out, and even more excited about how easy and inexpensive the project is.


Hope you enjoy!

xoxo


Glitter and DIY Weekends//

Happy New Year! 2016 is going to be such a wonderful year full of new marriages, travel, and new adventures! I can’t wait!

The season of do it yourself projects is upon me! This past weekend I had the house all to myself and took full advantage by taking over the house with all my projects! Today I’ll post my simple wedding DIY’s, but I have more to show you this week too!

I can also successfully say I used two bottles of glitter and got none in the house! I know, impressive! As people say, glitter is the herpes of the craft world! (haha!)

I went ahead and took care of my table number holders, glittered up feathers, and added some sparkle to our wedding parties toast glasses!

What You Need: 

Gold Paint- 2 bottles ($3.00 at Hobby Lobby)

Mint Paint(color: sweet mint)- 1 bottle ($3 at Hobby Lobby)

Small Paint Brushes- $1 at dollar tree

Gold Glitter- 2 Bottles ($2.99 at Hobby Lobby)

Spray Adhesive- 1 Can ($4 at Walmart)

Wooden Clips- 1 spool ($1 target bargain bins)

White Feathers- 1 package has 5-6 feathers ($3 at Hobby Lobby)

Wine/Champagne Glasses- $1 at Dollar tree


Let’s start with the feathers…

  1. Dump some gold paint onto a small plate and glitter on another
  2. Cover the tip of the feather so no white is showing, using the paint brush
  3. Dip the painted end in the glitter till it’s completely covered
  4. Lay out to dry
  5. Spray with Adhesive spray

Easy, peasy! And so cute! These will be used all over my wedding decor, and then all over our place! 


Table Numbers DIY

  1. Pour some sweet mint paint onto a plate and glitter on another
  2. Paint each wooden clip and let set to dry
  3. Spray ends with spray adhesive
  4. Dip glue ends in glitter till completely covered
  5. Spray again with adhesive to set the glitter
  6. Let dry

These will hold table numbers that are gold and cream! They’re so simple, they’ll add just the perfect amount of color and glam to the table. 


Last, the champagne! 

champange glasses

  1. Lay a towel down you can throw out
  2. Spray adhesive on the bottom portion of the glass
  3. Take a full glitter bottle, and dump glitter all over the glue area
  4. Spray adhesive to seal the glitter
  5. Let dry!

These glasses were $1 at dollar tree for their holiday collection! Such a score! The glitter adds a nice touch, and they’re water proof with the adhesive! Such a great addition to the wedding table, and our wedding party can take them home! 


Enjoy! Xoxo


DIY Headboards//

So Chris and I need a headboard. My bed frame does not have one, and since I’m less than traditional in taste,  I’m not entirely sure I want to just buy a quilted, or wood headboard to attach. And I am just never going to be a fan of those wrought iron, old school frames. They remind me of my grandma.

I put together a list of my favorite DIY headboards along with the links. Some of these are so creative, but I’m all for creative and EASY! I’m currently leaning more towards an awesome tapestry of some sort, but you never know!

If you have ideas, let me have em’!

  1. Tapestries

Pro’s: Add color, depth, design and dimension behind your bed, easy to hang

Con’s: They’re cloth, make sure you place it so your bed or pillows are pulling on it while you sleep or use your bed


2. Tufted Headboards

Pro’s: Add depth and accent to your bed decor, custom look for cheap

Con’s: Significant amount of work, many tools needed, risk of messing up

http://www.moneyhipmamas.com/2013/08/diy-upholstered-headboard-with-nailhead.html


3. Planks Walls

Pro’s: Accent behind the bed, appears to be a headboard, adds color

Con’s: Can’t move bed if you want to rearrange, would have to re-do wall if you want to change looks, larger project


4. Window Headboard

Pro’s: Unique, adds wall design but keeps it simple, can paint or design on the windows

Con’s: Hard to find, must be properly mounted, can be heavy


5. Macrame Woven Wall Art

Pro’s: Add’s depth, unique, can use different colors and patterns

Con’s: Hang high so it won’t be pulled, won’t go with all styles


Christmas DIY//

With Christmas on the way, it means it’s colder for most of us and there is more time spent indoors. When is there a better time to take out our craft skills and do some fun, Christmas Do-It-Yourself projects? Try one or all of these wonderful options out  next time you’re bugged about nothing being on the TV!

I’ve searched for 5 of my favorites options, that are both easy and festive. I’ve also tried to make sure I’ve picked the least tacky of all the options, we want our decor to look classy right?! Enjoy! And let me know if you try any! I know I’m going to!


  1. Mason Jar Snow Globes

These make great gifts, or something fun to set on a shelf or end table as a Christmas decoration. Obviously, they’re also fun to play and imagine with as the “snow” swirls around!

DIY Snow Globe

http://www.ohlovelyday.com/2011/12/diy-holiday-winter-wedding-decor-diys.html


2. Glitter Deer Head 

Black, gold, cream, and glitter? What is not to love! You could do this with any colors of your choosing, but it’s sure to impress guests and loved ones!

Glitter Deer Head

http://heylaurenrene.com/diy/diy-glitter-deer-head/?utm_source=feedburner&utm_medium=email&utm_campaign=Feed:+HeyLaurenRene+(Hey+Lauren+Rene)


3. Pine Cone Wreath

I think this is the perfect simple, neutral wreath for your door! You can add ribbon to it or paint the pine cones. The great part is, if you keep it neutral you can keep it up for the entire winter season!

pine cone wreath.jpg

http://lovegrowswild.com/2014/12/diy-pinecone-wreath/?utm_source=MadMimi&utm_medium=email&utm_content=New+from+Love+Grows+Wild!&utm_campaign=20141215_m123578497_RSS+Feed+for+http://lovegrowswild_com/feed/&utm_term=DIY+Pinecone+Wreath&crlt.pid=camp.9VsBUxVCNnVW


4. Handmade, decorative Christmas Tree’s

These are perfect to create for a mantle, shelves, side tables, desks, or any other place you could think to place them. They can add to your decor or be the main staple! Plus they’re so easy!

handmade trees.jpg

http://www.beautifulmatters.com/2011/12/handmade-christmas-trees-pt-1/


5. Christmas Garland

There are so many options for Christmas Garland, but I found this wonderful tutorial on this adorable, easy “Merry Christmas” banner to use for garland, and it’s a must try!

garland.jpg

http://blog.vickybarone.com/2013/12/06/diy-merry-christmas-garland/

The DIY Desk Project//

Y’all, I am obsessed with white and gold office’s! I love clean, minimal office decor. I am one that tends to get rather distracted, so having a more minimal, white room instead of lots of colors is what I needed for adequate work and studying.

These are some examples of current offices I love:

office blue office

That white and gold with a pop of color gets me every time!

Now, for my desk, all I had to do to achieve the white/gold look is spray paint the legs. Thankfully the desk came un-assembled so I was able to easily separate everything!

Here are the materials I used for the desk:

1 white desk- Walmart, $30

1 can of gold spray paint- $7

That’s it! 

I spray painted the legs with one coat, let it dry for 24 hours and attached it to the desk top.

Processed with VSCOcam with f2 preset
(PUPPY NOT INCLUDED)

My room decor previous to moving was bold corals and turquoise with golds, creams, and tans. You’ll see these accented colors on the desk top.

Processed with VSCOcam with hb2 preset

I went for a more shabby chic feel so I have a large, wonderful collection of vintage jars, re-purposed lamps, and my cute, little apple basket for my books and magazines seen in the first picture above.

SIDE NOTE: I am currently living with the folks before my wedding in May. I did not pick the carpet or wall color- it was done before I moved in. This project is to only note my DIY desk project. If it were me the walls would be cream and the floors would be wood or cream carpet! My mom has excellent taste, we just have completely different styles.

The wooden arrow and phrase on the top level were done for me by a wonderful friend for a birthday gift. You all know I love arrows, and I LOVE that quote.

Processed with VSCOcam with f2 preset
(possible wedding flower crown!)

I also collect mugs and always, always have candles lit. Obviously my scent of choice is pumpkin with the season! The mug was a gift as well, but I believe it was from target!

Processed with VSCOcam with g3 preset

The turquoise, green jar is my favorite jar I’ve ever found. It has a unique, deep color and I love the lid. It’s perfect size to hold my odds and ends.

Processed with VSCOcam with hb2 preset

Overall- I love my desk! There are always things I want to do and change, and I think I’m feeling a style change once I’m married and moved. As a designer at heart, it’s so hard to not want to try so many different ideas all the time. I think I’d redecorate once a month if I could afford it!

DIY Your Front Porch//Fall Edition

October is here which means fall decorating is in full swing. As I drive by homes, I see pumpkins sitting on front steps and DIY wreaths hanging from doors. Why don’t we all get in the spirit?!

Decorating your front door and/or porch does not have to be expensive or challenging. When you have such beautiful elements to work with, it’s pretty simple. Here is my list of easy purchases and some ways to blend them together:

  1. Apple Baskets full of fake apples or tiny pumpkins
  2. Apple Baskets or Tin tubs used as a “pot” for colorful mums
  3. Large pumpkins
  4. Straw bales
  5. DIY Indian corn wreath
  6. Cornstalks tied around porch columns
  7. Spray painted pumpkins
  8. Lanterns with candles

Below are some my finds on Pinterest, with the links of well-done fall front doors. Check out my fall board on Pinterest by clicking the icon on the right hand side of my blog for more inspiration!

I can’t wait to have my own front door next year to decorate:)

apple baskets

plaidandpolkadots.typepad.com

corn stalks

http://snapcreativity.com/7-sensational-fall-porch-ideas/

indian corn

http://www.stonegableblog.com/indian-corn-wreath-diy/

lanterns

http://preweddings-weddings.blogspot.com/2010/09/beautiful-of-autumn-wedding-decoration.html

glitter

http://www.unoriginalmom.com/glitter-monogrammed-pumpkin/